Wednesday, October 19, 2016

Science Week: 1

I love teaching Science! The dual language program in my district requires that we teach Science in Spanish which makes things extra exciting in the beginning. Kids are learning rules, routines, letters, new subjects, and a new language! Whew!

I love this activity for the beginning of the year. I use these fine motor mats when introducing Science Tools. Here's what our week looks like while we are exploring Science tools:

M:   Lupa (magnifying glass)
T:    Gafas (goggles)
W:   Gotero (droppers)
Th:  Balanza (balance)
F:    Pinzas (tweezers)-Fine Motor Mats

The kiddos LOVE using the tweezers! (It's a perfect Friday activity, if you know what I mean.)


After we have explored them during Science, I put them in a center for the remainder of the month. It's a great activity for keeping those little fingers busy!


You can find these mats in my TPT store here:


Monday, August 15, 2016

My Classroom Library

My most favorite part of my classroom is always my classroom library. A classroom library should be inviting and FUN, but above all, purposeful. Pinterest is great, but lets face it, how many times have we tried something so completely unrealistic only to end up with something that is definitely not worth posting, and a box of supplies that we will never use again? My library is 4 years in the making, and it is the one thing in my classroom that I feel will ALWAYS be a work in progress. So do not stress. Do what works for you. Even if that does not involve hand stitching a circus tent or forming a tree trunk out of paper mache.

Now for the tour...

Display shelf
This is where I display books based on the unit we are studying. They are switched out every 3 weeks when we start a new unit.
AR Books

This is a great project to assign to your room parent, kind volunteer, PTA, passerby, anyone with a pulse, etc. Nothing, and I mean nothing, has consumed more of my time than leveling and labeling books. Nothing.
The buckets on this shelf are reserved for readers that have AR (Accelerated Reader) quizzes available online. My school participates in AR and has school-wide contests and incentives to get students to read. They love it, but this can be tricky to manage at such a young age.

To make things easier, I first find the book's level. I write the book's level on either a blue or red dot sticker. (Students know that blue dots mean the book is in English, and red dots mean the book is in Spanish.) I like to use the Accelerated Reader app, or type in the book title on their website. The following apps are also great to help with this:
Scholastic Book Wizard
Accelerated Reader
Then, I write the quiz number on the back of the book in Sharpie. This has saved me so many headaches. It is SO much easier for kinders to type the book's number instead of typing the entire title of a book.
I also stick a star sticker next to the book's level. The star signifies that the book they have chosen has a quiz available. In the event that my books do not get put back in the right bin (hard to believe, I know) the kids will still know that book has a quiz. I teach English language arts in the morning, while my partner teacher does the Spanish, so all of my bins on this shelf are blue (English). Kids choose a few on their level for their book bag during read-to-self.

The rest of my picture books are organized in white baskets. Here, they are organized by category. Those baskets may contain Spanish and English books, and books also labeled as AR quiz books.
My last and final tip: the clip system! Every student in my class is assigned a number at the beginning of the year. I use this number to label everything that is theirs, so they learn it pretty quickly.
When picking a book, students grab the clip with their number on it and clip it to the basket they have grabbed their book from. When they are done reading their book, they find the basket with their clip and place the book back. This also helps remind them to only have one book out at a time.

I would love to see your library and what you do to keep it organized!

Hasta la proxima,
Miss Torres

Friday, August 5, 2016

The Printer That Changed My Life!!!


Do you print at home? Most of us (even if we do have resources at our school) end up having to print forms, lesson plans, last minute homework, and lets not forget...those things that we just need to print in COLOR.

HP is here to save us all. Literally, I have only been using the program for a couple of months and cannot get over about all the money that I have SAVED!

HP Instant Ink is a monthly printing program that tracks your printing wirelessly. You choose a plan that fits you depending on the number of pages that you normally print, and then let the fun begin! The best part? When you run out of ink, they send you more...FOR FREE! I will give you a moment to let that sink in.

I personally, am enrolled in the $9.99 plan. I can print 300 pages every month, using as much ink as I need, AND if I have any extra pages, they rollover!
I printed 3 months worth of centers with my plan last month!
Check if your printer is eligible:


  • HP DeskJet 3630 series
  • HP ENVY 4500 Series
  • HP ENVY 4520 series
  • HP ENVY 5530 Series
  • HP ENVY 5540 series
  • HP ENVY 5660 Series
  • HP ENVY 7640 Series
  • HP ENVY 8000 series
  • HP OfficeJet 3830 series
  • HP Officejet 4630 Series
  • HP OfficeJet 4650 series
  • HP Officejet 5740 Series
  • HP Officejet 8040 Series with Neat®
  • HP Officejet Pro 6830 Series
  • HP Officejet Pro 8610 Series
  • HP Officejet Pro 8620 Series
  • HP Officejet Pro 8630 Series
  • HP Officejet Pro 8710 Series
  • HP Officejet Pro 8720 Series
  • HP Officejet Pro 8730 Series
  • HP Officejet Pro 8740 Series


  • My gift to you! Use this link when signing up, for a FREE month of HP Instant Ink!

    (Please note: I am not affiliated with HP, these are my honest thoughts!)

    Hasta la promixima,
    Miss Torres

    Monday, August 1, 2016

    S.T.E.M Center-Can you build this?


    I have been wanting to incorporate more S.T.E.M. activities into my classroom and this is the perfect way of doing just that! I love watching my little engineers problem solve while attempting to build the monument or bridge from the task card-they get so into it!

    You can find these picture cards on my TPT store here.

    28 cards total. 14 full-color picture cards, each with a matching facts card.

    I have seen some teachers place things like this in binders, and keep them in the center all year long. Others laminate the picture cards and place them in a tray or on rings at a center. I like to place one card out every week at my block center. This way, it keeps the excitement going year-round, and keeps those arguments on what the team is building, to a minimum! 

    My new addition this year that I am so excited about, is the Architetrix Constructor Set that I picked at Lakeshore Learning last week. I can't wait to watch my students design their bridges with these. This is a great product to work on those fine motor skills and would also be perfect to use in math or math center when building 3D shapes! (Replacing those sticky marshmallows and toothpicks.)

    I love setting out graph paper, notepads, or even just notebook paper for my kids to "plan" their designs. Keep them writing!
    Do you think my kids will be better at this than I am? ; )


    How do you S.T.E.M. in your classroom? Comment below!

    Hasta la proxima,
    Miss Torres

    Sunday, July 31, 2016

    Listening Center Part 2


    QR codes! QR codes! QR codes!

    I love technology, and this year there is a HUGE push for more of it in the classroom from my district. (Now, if only we could get the money/devices that we needed into our classrooms! Who's with me?)

    Part of my listening center organization for this upcoming year was to conquer QR codes. A little background about me: I've been referred to as "Frugal Fran" once or twice in my life. Don't get me wrong, I love to spend just as much as the next girl. Nothing like finding the perfect pair of fall booties at the semi-annual sale at Nordstrom Rack. My philosophy: if I get it on sale, I can buy two. ;) It makes everything inside of me boil when unnecessary purchases are made, especially when these purchases are made by the higher beings above us based on what they think that we need. Okay, I'm done now. 

    Listening centers are hard. The devices themselves are outrageous, but necessary. (People, we need to move away from cassettes!) Purchasing books that already come with a CD is costly-don't even get me started on the prices for Spanish materials. To solve this, I started recording my own voice and burning the track on a CD. HUGE money saver, and it's super easy! Plus, the kids LOVE hearing your voice on the recording. But I just wasn't completely happy with that either. I felt wasteful burning one track to each CD, and if you are trying to burn an entire library, that will get costly too! Insert: QR codes.

    Here's the run-down of what it will look like in my classroom this year.

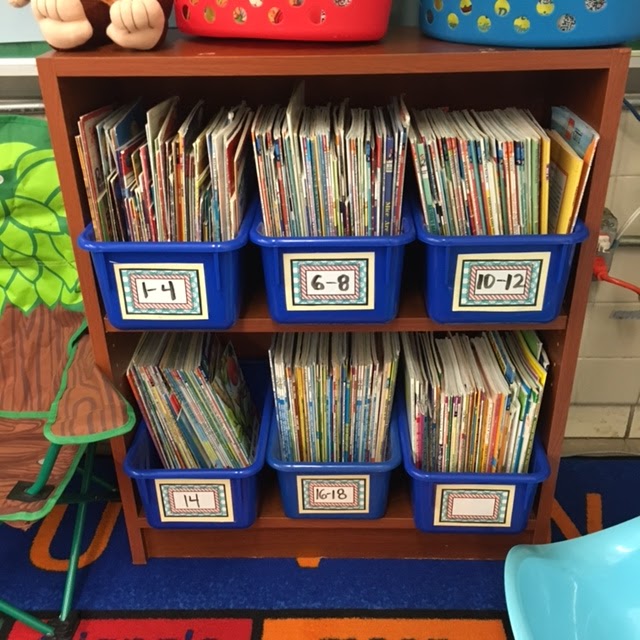
    I place each of my listening center books in a gallon-sized baggie. Inside is the book with the QR code taped on, and the CD of the recording IF I already had a copy. I like to keep all of my books for the listening center together in a skill box, or plastic "magazine" storage containers. 


    You can stick the QR code anywhere, really. You can even laminate them and place them on rings! I like to tape mine on the inside of the book. In my head, this will hopefully keep little fingers from picking at them.


    I keep a schedule of my listening book rotation, you can grab a copy here. When it is time for a new book, I pull it out of the bag and place it in the center. The kids scan the QR code and have the book read to them-voila!

    How did I create these magical little squares you ask? Here's how I made magic happen for me.

    I cannot tell you how long I searched for the right link/converter. There are tons of great teachers out there with QR resources, and I am not one to try and re-invent the wheel but none of them were cutting it for me. (Remember the comment about not wanting to waste money? Well, the same applies to time.) All of the QR codes that I was finding led students to a link on safeshare.tv. This takes any youtube video and takes away all of the ads and additional links. Stand-alone this is a great site, but for me personally, I do not want my littles to spend their time at the center watching a video of someone reading instead of interacting with the physical book in front of them and TRACKING the print. 

    First, and foremost, in order to create any QR code, you will need a url of what you are trying to convert. If you already have a recording of the book on a CD or one saved on your computer, you don't need this next step! If not, here's how to record your own:

    You will need to create a quick account at www.soundcloud.com. After creating an account, it will take you to this page:


    You can choose to upload a track from your own computer, or you can record your voice right there! Tip: I like to play a "beep" from any sound app on my phone or ring a bell to signal kids to turn the page.

    Once you have uploaded the track, you will see all of your audio listed under your "tracks".


    Click, "share" and soundcloud will generate a url link for your audio-this is what you want in order to create a QR code.


    Next, you will want to go to a QR creator-site. I like this one. All you have to do is copy and paste your newly create url link, and it will automatically generate a QR code for you. The QR code is then all yours, and you can download and paste into any document for printing!


    I have created some to get you started on your listening center this year. Check them out on my TPT store-they're FREE! Currently, I only have the English uploaded but I am working on the Spanish, I promise!


    I would love to know how you are using QR codes in YOUR classroom. Comment below!

    ¡Hasta la proxima!
    Miss Torres


    Saturday, July 30, 2016

    Summer Project: Listening Center Part 1

    I cannot believe how quickly this summer has gone by! I of course had an over ambitious to-do list and was only able to mark off about half of the items. One that I am most proud of, organizing my listening center.

    One of my main goals this summer was to get a better handle on my listening center. I don't know about you, but I was living a daily life of CD's not working, kids pushing the wrong buttons, turning the dials too far on the volume, and I was not always the best at keeping track of the book. As I was building my listening center library this past year, I chose the book for the week based on any new material that came in, a book I had borrowed, or one I had time to record on the weekend. This eventually lead to cry after cry of, "we already read this one!"Nothing like trying to start a reading group and hearing that. So, I introduce to you, my new system.

    First and foremost, I needed a schedule of books that I wanted my babes to listen to throughout the year. I have based these choices on the story element/comprehension skill for the month (my district uses Texas Treasures).  Here's an example of my schedule: 


    Let's be honest, this is subject to change! But I feel much better about seeing the year as a whole, as opposed to digging in closets looking for new books. I have committed to running each book on a two-week rotation, which ends up being 2-3 books per month.

    Follow this link to my TPT site! You can print the template for FREE and pencil in the books that you want to use for the month, and the student work, or focus, that you want to cover. As always, it's available in Spanish as well!


    All of my centers have some sort of writing component to them, including the listening center. I love this resource from a different wonderful blogger to get started, and it's free! Each month, we introduce a new story element and comprehension skill. We ALL practice filling out a sheet after a read aloud, before I set it in a center. This way, I do not have to introduce something multiple times because they have all already done it!

    Up next, part two of my listening center remake: conquering QR codes! Stay tuned!


    ¡Hasta la proxima!
    Miss Torres